

How to Personalise a Rope Basket
/
A basket filled with useful items makes a brilliant baby shower gift. Why not give your gift a little something extra and personalise the basket? The basket can be used afterwards for toys or storage of some other type of baby paraphernalia!

I personalised a basket that I picked up in TK Max for a gift for a special baby, let me show you how.

How to personalise a rope basket
What you need:
A rope basket
Cotton yarn
A small crochet hook (or another way to make an i cord)
Sewing thread that matches the basket and a sharp needle
LOTS of pins
Ways to create an I cord
The first thing you need to do is create an i cord. This is a thick cord that you are going to use to “write” on your rope basket.
There are several ways you can do this:
Crochet
This is the method I used to create my i cord. I followed this simple tutorial from Planet June to crochet my I cord. Another great tutorial is this one on You Tube from Bella Coco.

I used a 3.5mm clover amour hook and a DK cotton blend yarn from Hobbycraft.
Knit
If you prefer to knit then this knitted i cord tutorial from Nimble Needles is very good. I find knitting something this tiny a bit fiddly so prefer the crochet version but the results look the same so this might suit you better.
use an i cord machine
You can buy purpose made machines for making i cord. Lots of fun to use, you turn the handle and the cord is produced by what feels like magic and at super quick speed! Loads of fun for kids to use (and for adults too of course!)

old style French knitting
Did you learnt to French knit as a child? My nan made me a knitting dolly from an empty wooden cotton reel (thread spool) with 4 nails banged into the top. These days you can buy specially made devices, I’ve found a few online but must confess I’ve not personally tried any of these out:


Or this more traditional looking knitting dolly.
buy a suitable cord
If you don’t want to make your own cord you could get a similar effect with a ready made cord. I had a quick look to see what is available and think a braided macrame cord would work well. If you go for a braided cord it’s less likely to unravel than a twisted cord and macrame cord comes in different thicknesses so you should be able to find something that will work.
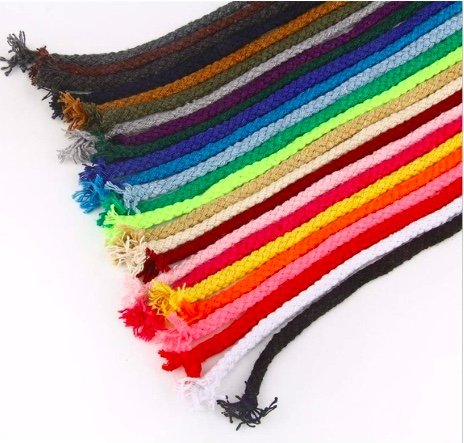
This 5mm macrame cord from Amazon comes in lots of different colours. It’s a little thinner than my homemade i cord but could work quite well.
Make about 1/2 a metre or so of i cord if your name is short, more if you are doing a long name. How much you need will depend on the name you are doing of course. Don’t tie it off at this stage, leave it attached to your ball of yarn so you can carry on and make more if necessary.
Once I though I had roughly enough it was time to start attaching it to the rope basket.
Attaching the cord to the basket
You could use an air or water erasable fabric pen and write the name centrally onto your basket. I didn’t do this, I was just winging it but if you are more of a planner it might be worth marking it first.
This is actually really easy, put the basket on your lap or a flat surface in front of you. A small cushion or pillow stuffed inside can help stop it from rolling around as you work.
Start laying the cord out to spell out your chosen name. You can overlap the cord as you loop it from letter to letter. When you are happy with the arrangement, start pinning. And when I say pinning I mean LOTS of pins, loads and loads! Just stab them right through.
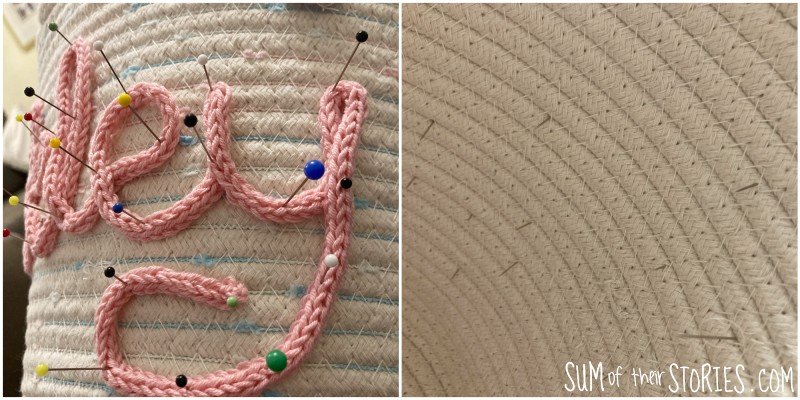
Take a length of sewing thread on a sharp needle and tie a knot in the end. You are now going to stitch the cord in place. Just work carefully from one end to the other. The main hints and tips I can give you are:
Start from the inside so the knot in your thread is inside
Poke the needle straight through the basket at right angles
Use tiny stitches on the front, hidden in the cord
Use slightly larger stitches on the inside but try to keep them to about 1” (2.5cm) maximum length, this will avoid loops on the inside which could get caught on things (or tiny fingers)
Don’t pull the sewing thread too tight, it’ll pull the i cord out of shape
Don’t make your thread too long. It’ll just get caught up on the pins as you sew. Better to use shorter lengths and just secure them and start a new length as necessary
TAKE CARE when your hands are inside the basket, those sharp pins are all poking through remember!
It’s easier to poke your needle between the rope rather than straight through it
Remove the pins as you go
Don’t rush, I sewed this name on whilst watching tv and did it in an evening

You can see that I created a shorter length of i cord for the O of my chosen name “Oakley” so it is separate to the rest of the name. That was just because I couldn’t find a way to join the capital O with the a and have it look good and be readable, what you do will depend on the name you are adding to your basket.
It might seem a bit crazy to poke the pins right through the basket and risk stabbing yourself with them but I found they just fell out prematurely if I didn’t poke them in far enough. Pins all over the floor and the letters unravelling - not ideal.

If you don’t want to stitch the i cord to your basket you could glue it in place. A good quality fabric glue would work. I prefer to sew it however, it’s more secure and when something is for a baby I think that is important. It takes much longer but for me it is worth it.
Because of the way a rope basket like this is sewn together you can barely see the sewing thread on the inside.

I filled this basket with some gifts for baby Oakley.

Now I have a confession. Oakley is actually coming up for her 1st birthday! I actually completely forgot that I’d never got around to sharing how I personalised this basket for her here with you - ops!

You could personalise different containers with i cord in this way, it doesn’t have to be a rope basket. A fabric basket would work just as nicely. I think a traditional woven basket, made from reeds (or whatever it is they make baskets from) might be more difficult, it would be harder to get even “writing” if the surface is uneven. It could be harder to stitch as well.
A small basket could be personalised with a much finer cord to make a smaller name or how about just an initial?
Julie
I’ll be sharing this tutorial at some of these link ups


