Paper Serviette Poinsettias
/
It's quick and easy to turn red paper serviettes or napkins into pretty poinsettias to use in your decorating this Christmas.
Read MoreIt's quick and easy to turn red paper serviettes or napkins into pretty poinsettias to use in your decorating this Christmas.
Read MoreDoodle a special card for someone themed around their favourite fandom in a mandala style.
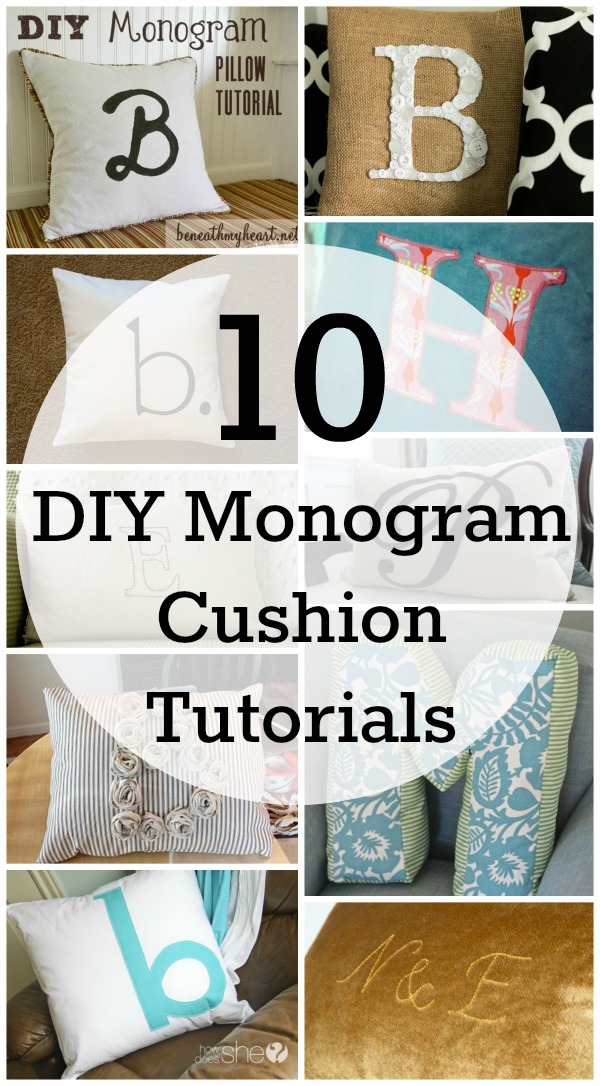
Read MoreMonogramed Cushions or pillows are a bit of a home decor classic. If you have basic sewing skills it's not difficult to have a go at making them yourself.
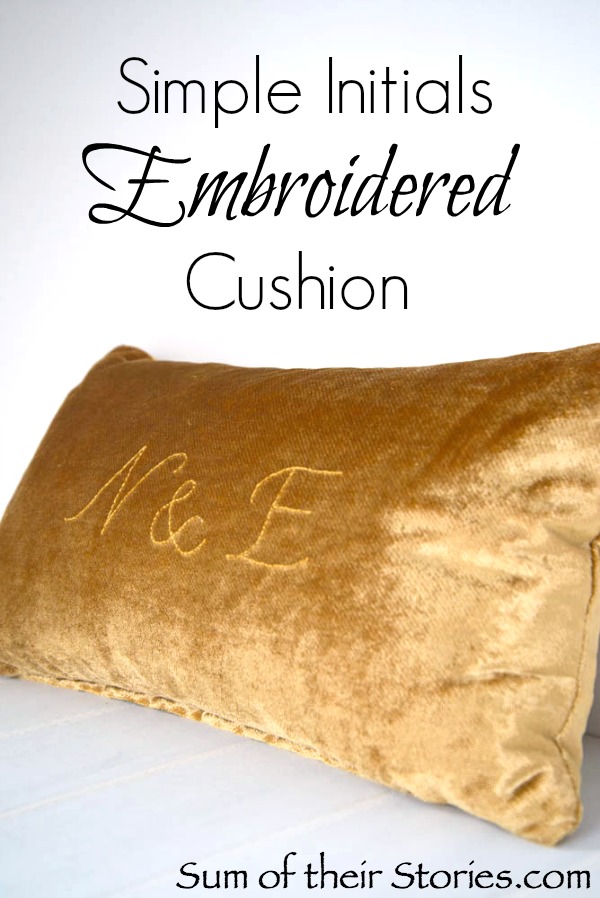
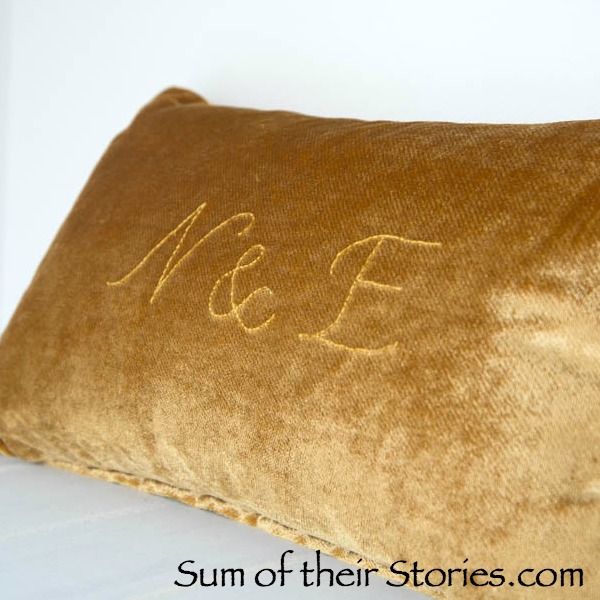
I wanted to make something classy and unfussy for this couple as that suits their style but still wanted it to be personal for them. After some deliberation and time on pinterest searching for inspiration I took a plain gold shop bought velvet cushion cover and embroidered the couples initials in a very simple back stitch.
I found this plain gold cushion in TK Maxx and fell in love with the velvet. A plainer fabric would actually have been easier to stitch on but the velvet has a beautiful sheen and texture which I do love.
I also chose an embroidery thread the same colour as the fabric so the embroidery is subtle, you could easily do a contrast for a bolder effect.
To make a Simple Initials Embroidered Cushion you will need:
A cushion cover and insert
Embroidery thread
Computer, printer, paper
Needle, pins, scissors
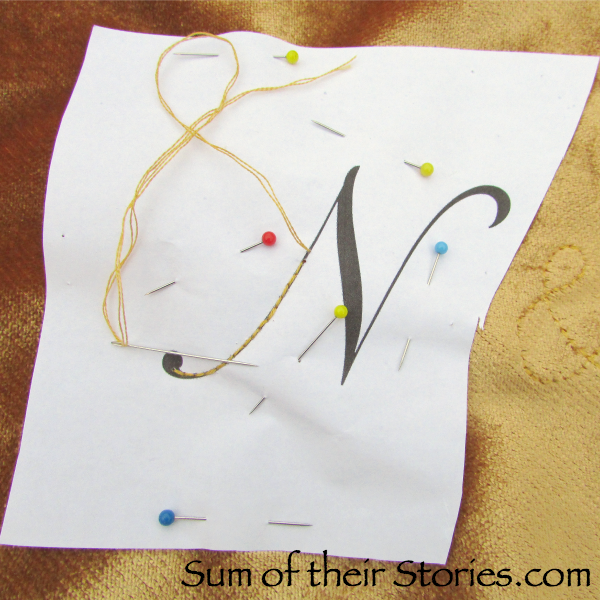
First go onto the computer and select a font you like. Play around with different ones you computer has,
I used the font "Small Roundhand" for the N and & but I didn't like the E in that font, it was one of those backward 3's so I did the E in "Apple Chancery". If your PC doesn't have lots of great fonts you can use Picmonkey, Ipiccy or some other photo edit online site in design mode as they have lots of cute ones.
Print out the initials in the size you want, this will depend on your cushion cover size of course. You may have to print it a few times until you get the size right.
Trim the paper close to the initials then pin the wherever you want them on the cushion. I did mine centrally but yours could be anywhere you like. Use loads of pins so it doesn't slide about.
Using 2 strands of embroidery thread stitch the initials in backstitch going through both the paper and the fabric.
When you are done, gently pull the paper away. I found it easiest to tear the paper as close as I could to the stitching first then the little bits just pull out easily with your finger nails or tweezers.
Simple as that! You can see in my photo above that I had trimmed away the paper around the letters as I finished each one, that is not necessary, I was just checking it had worked!
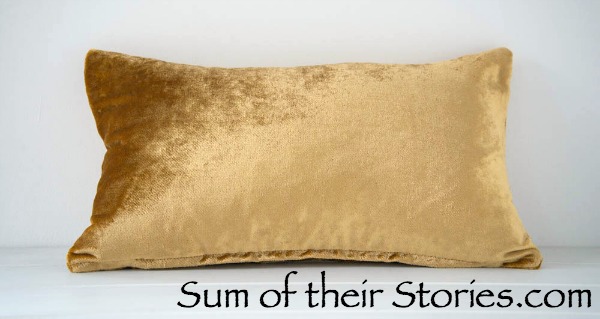
All these photos are taken on an angle as that shows the embroidery better, with the nap of the velvet it was hard to get the initials to show up nicely on a photo.
If my velvet initials cushion doesn't take your fancy or suit your style how about some of these beautiful DIY monogram cushions and pillows.
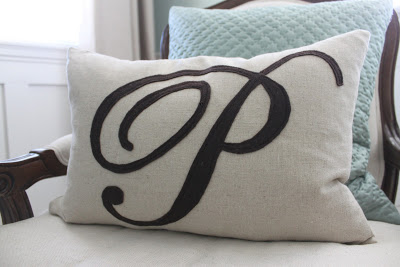
This beautiful cushion was made by Robyn from The Farmer's Nest, it's another done on a ready made cover using a super simple embroidery stitch.
I love this twirly font Trisha from The Sweet Survival chose for this felt monogram pillow, so classy. The Sweet Survival site doesn't exist anymore so this is just an inspirational photo now.
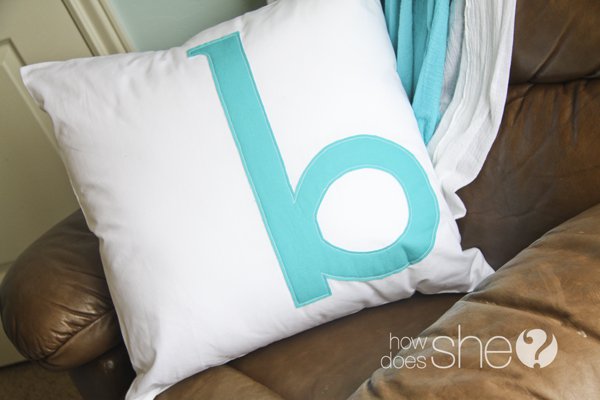
Here is another felt letter but with a completely different look. So cute and modern. It's from
How Does She and has a great step by step tutorial.
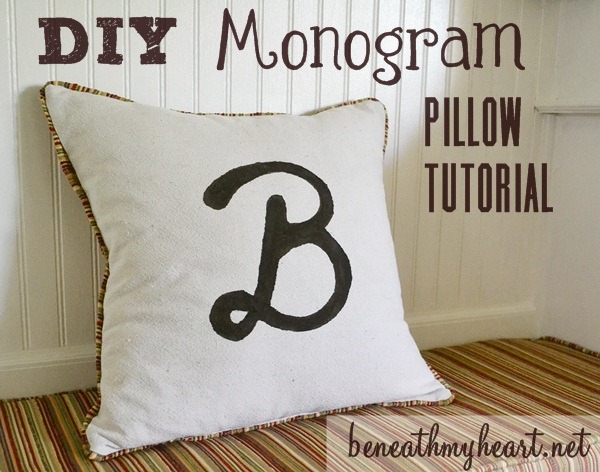
This cover from Beneath my Heart has a stencilled monogram. The tutorial includes a great set of instructions of making the cover, including that pretty contrast piping.
Another stencilled idea from Merrick's Art, so simple, so effective.
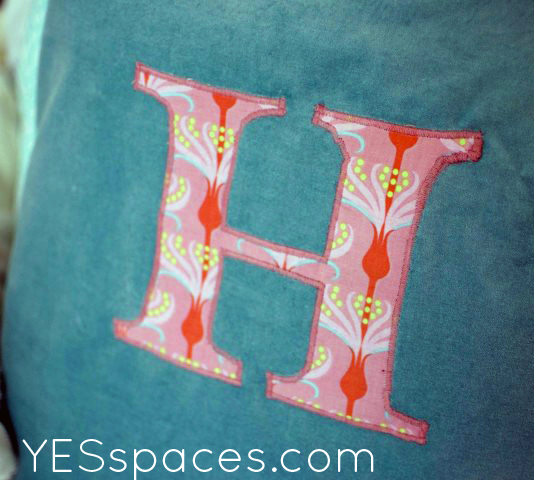
If more colour is your thing, how about this beauty from Yes Spaces. It's made using a traditional machine applique method and a ready made plain cover. It would be a great way to use up fabric scraps.
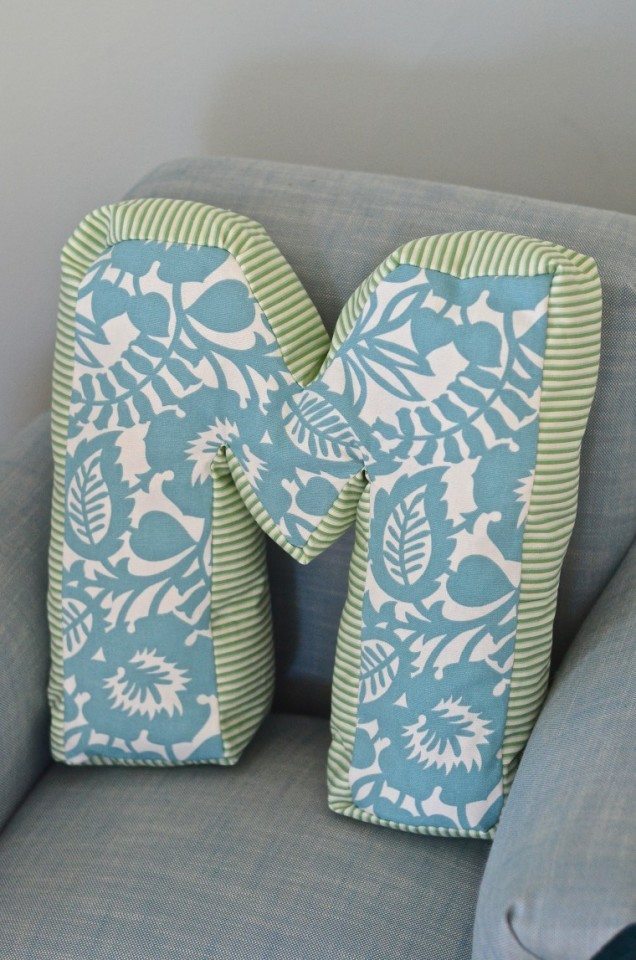
This is a little bit different, a letter shaped cushion. What a fun idea from Classy Clutter.
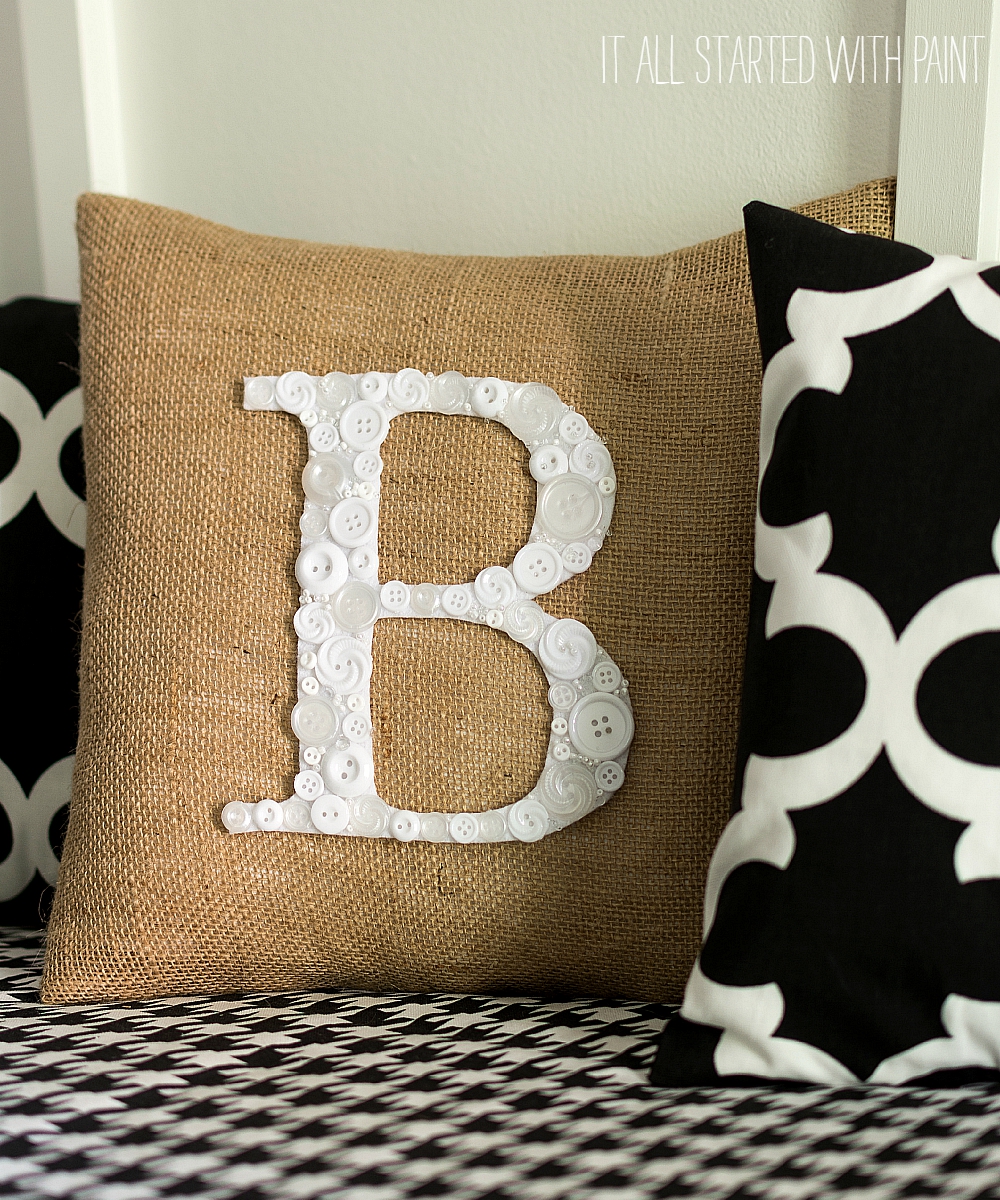
I do love a good "crafting with buttons" project and this one from It all Started with Paint, is just lovely.
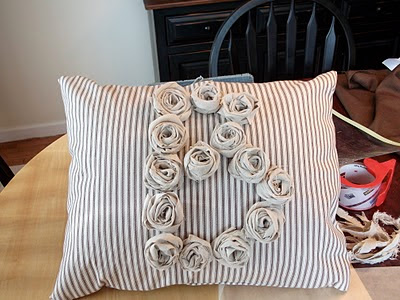
This beautiful letter made from fabric rosettes is so pretty. Kaitlyn from The Birds Nest used a liquid stitch glue so this is a "no sew" option, but of course you could make a "sew" version if you prefer!
Whether you call them cushions, pillows or something else entirely, hopefully you have found some letter and monogram inspiration here.
Funny how so many of these tutorials are for the letter B - 5 out of the 10 - I wonder why that is?
I'll be linking up at these great link parties
Make a unique piece of Christmas art for your home with paper and a craft knife. It's not especially difficult, simple drawing skills and then quite a lot of patience is all that's needed!
Read MoreA quick and easy way to brighten up a plain old jumper or sweater, giving it a simple daisy embroidery.
Read More20 cheap, fun birthday ideas - making birthdays special without spending a fortune, it's the little things that count!
Read MoreGeometric ornaments for your Christmas tree made with origami, Add tassels, pom poms or beads to make it your own.
Read MoreWith Halloween looming I've been a bit nostalgic for the days when my kids dressed up and went Trick or Treating. Most years they decided what they wanted to do a maximum of 24 hours before, sometimes even on the afternoon of the 31st October, so most of the things we've done are pretty last minute!
Read MoreSaving an old piece of knitting and turning it into a little clutch was a bit of a fiddle but I think, well worth it.
Read MoreWhat a fun way to use up left over scraps of yarn. If you know basic crochet stitches you can make a super cute amigurumi owl! Inspired by a pattern from the brilliant Kristi Tullus.
Read MoreSweet little crochet flowers turned into a garland, a fun and easy project
Read MoreA really quick and easy way to give a plain cardigan a new look.
Read MoreI'm Julie, I love making things. This is where I share my ideas and enthusiasm
This site contains affiliate links. If you click through any of these links and make a purchase the cost to you will be the same but Sum of their Stories will receive a small commission. As an Amazon Associate I earn from qualifying purchases. You can find more details here.
Powered by Squarespace.