Daisy Jumper Refashion
/A quick and easy way to brighten up a plain old jumper or sweater.
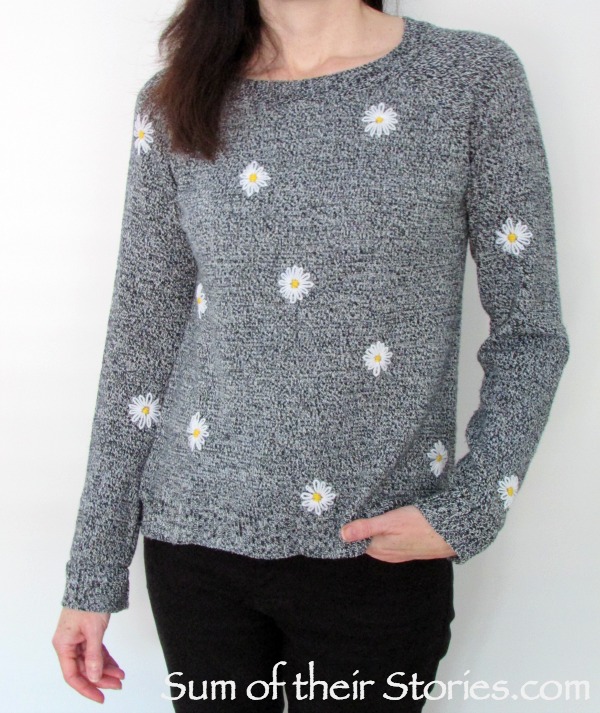
I've seen a few cute embroidered jumpers in the shops this autumn and came home from a shopping trip feeling inspired to give one of my old plain jumpers a bit of a makeover.
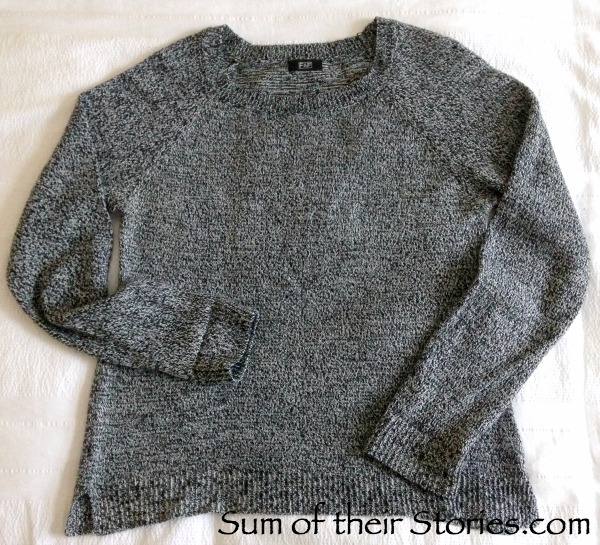
I started with this marl knit black and white jumper.
It's a good fit and not too worn or bobbly, just a bit boring so perfect for an embroidery experiment.
To make your own daisy jumper you will need:
A plain old jumper
Scraps of yarn, mine was UK Double knitting but you can use whatever you have
A large needle
Scissors
First take a long length of white yarn, about an arms length. That's quite long for sewing with but will mean you can get a whole flower done in one length.
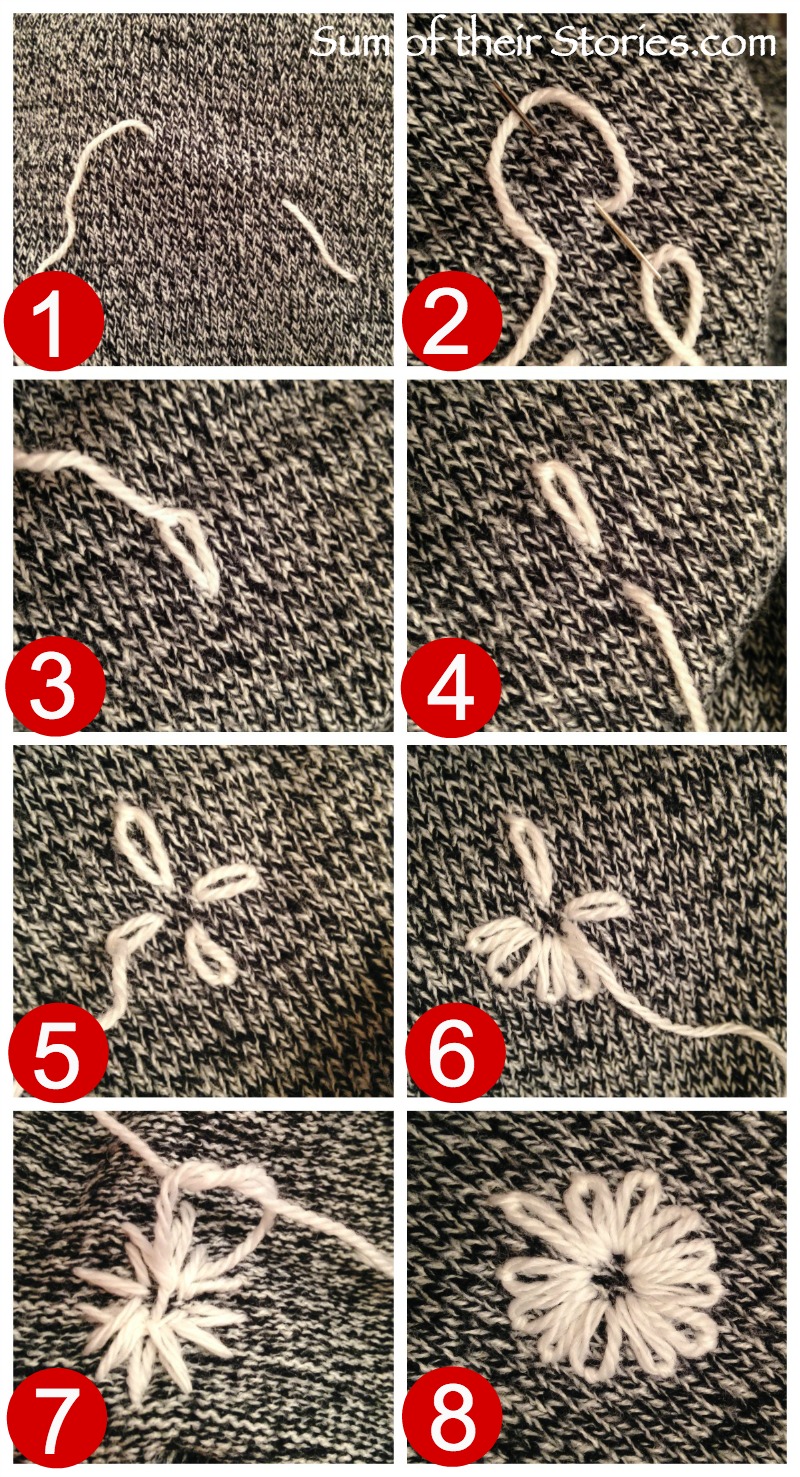
We are going to make the flowers using a lazy daisy stitch which is really simple. If you don't already know it, here's how:
How to embroider simple yarn daisies
With the right side facing, poke your needle down into the fabric and come up where you want the daisy to be, leaving a tail which you will secure later.
Form a loop and put the needle back in the same spot it's just come from, then up about 3/4 " away.
Pull the thread through until the loop sits flat on the fabric (don't pull too hard or the petal will bunch the fabric up)
Insert the needle back in just the other side of loop you just made, forming a tiny stitch. Come back up about 1/4" from the base of the first loop/petal
Repeat for all the petals, I did 4 as shown first.
Then fill in two more petals between each.
On the back, tie the two ends of your yarn together in a double knot to secure
Ta dah!
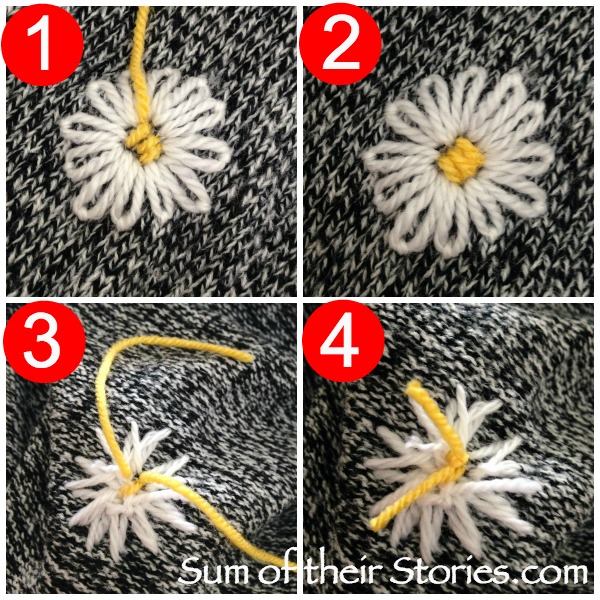
Next fill in the centres with a contrast yarn.
Make a few little stitches on one direction
then repeat in the opposite direction covering the original stitches.
Tie the ends as before in a double knot
Trim all the ends.
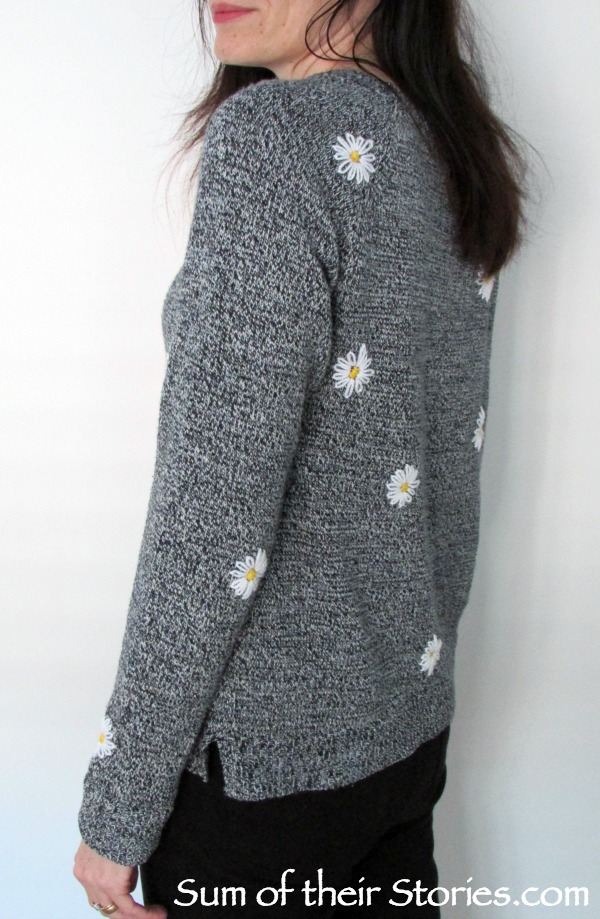
Dot these daisies all over your jumper, as many or as few as you like. I covered the back and sleeves too as I have this thing about clothes that are all fancy on the front but plain on the back. I like an all over fanciness whenever possible!
Deciding on the placement of the embroidered daisies
To help with the placement I did about 5 on the front then tried it on. I then added safety pins to the spots where I thought more should go. This way I avoided any unfortunately placed daisies (you all know what I mean) and could get that even spread I was after. I just found it was easier to tell when it's on the body.
I did consider doing the flower centres black, but I went for the brighter yellow in the end as I can't resist a bit of colour. I think black would look good too, especially on a coloured jumper.
You could do the flowers in any colour, or even all different colours and really use up some tiny scraps of yarn.
You could do way more flowers than I did, or way less ... they could just be round the hem, or round the neck, or in a line from the shoulder down the centre of the sleeves. Oh the possibilities!
Julie
I'll be linking up to all these great link parties


