

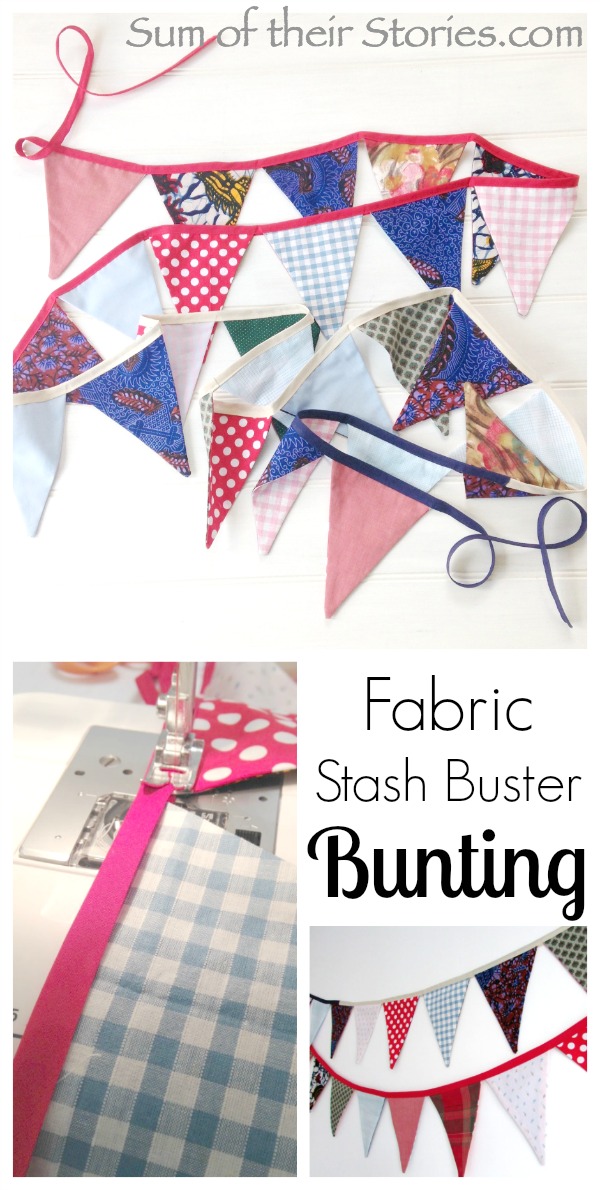
Fabric Stash Buster Bunting
/Make a dent in your fabric stash by making a garland of pretty bunting.

I confess - I am a fabric hoarder.
I don't buy lots of fabric (though I DO find it hard to resist a pretty stack of fat quarters) instead I tend to buy large sized items in Charity shops and chop them up. I also inherited a couple of bin bags full of fabric from my mum & nan: old clothes, half made items, left over bits from things they had made and all too good to waste.

My biggest issue however is my unwavering inability to throw away those small scraps that you inevitably get left with when sewing something. Odd shapes, long strips - you know the bits I mean! They just seem way too useful to throw out, surely I will use them for some fabulous patchwork project one day.
Last year I set about making a conscious effort to actually use those bits. I made a load of Pocket Pack Tissue Holders but that made only a small dent in the stash. New Year : New me. Let's try again.

For a birthday gift I made this scrap fabric bunting. It's quick and easy, I cut out and made this in an evening.
If you are a complete beginner and just thinking about taking up sewing as a hobby then you might find the article I put together on “What you need to get started sewing” helpful. I list all the equipment that you’ll need, the essentials that you can’t really manage without.

To make your own scrap fabric bunting you will need:
Scraps of fabric
scrap card to make a template
scissors (different ones for paper and fabric, don't be using your good fabric scissors for card now will you!)
Bias Binding (you can get a great little tool to make your own bias binding)
Thread
Sewing Machine
How long is the bunting?
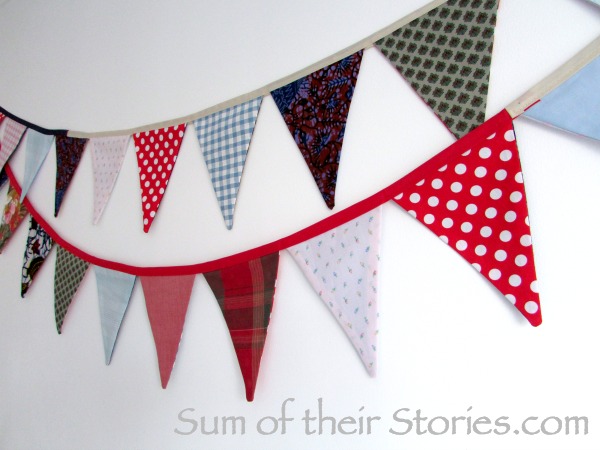
I made 25 bunting flags and my bunting measures about 4.5m/5 yards when finished. You can make as many as you like and your bunting can be as long or short as you wish.
Prepare a pattern template
First cut out a triangle template from card. Mine is 10.5cm/6" x 19cm/7.5" which made a nice size bunting garland.

Prepare your fabric flags
Iron your fabric scraps if they have been all scrunched up in a box or bag somewhere, maybe even wash them first if they smell a bit musty!
Using your template cut out triangles from your fabric scraps. It is worth checking the grain (direction the weave of the fabric goes) and cutting them all the same way if possible. I may have snuck just one or two triangles in there that were cut at an angle, just because that was the only way they'd fit but mostly I was good and the grain line followed straight down the centre of the triangle.
We are making double sided bunting “flags” so I cut 50 triangles in all, to make 25 flags.
Sew the bunting flags
Place any 2 triangles right sides together and stitch along the 2 long sides. Mix and match the fabrics, we are fabric scrap busting here after all.
Continue for all the triangles so you have a nice heap of stitched flags.
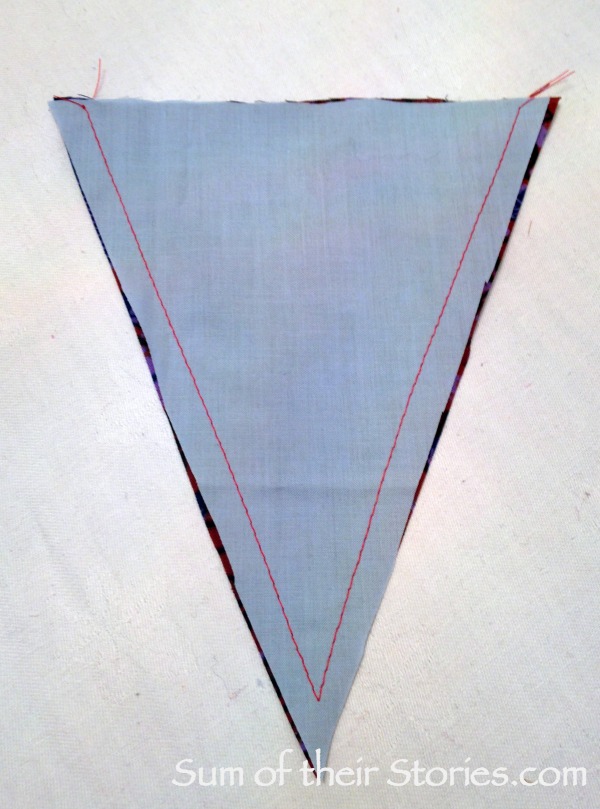
Trim away the seam allowance near the narrow point as shown below, close but not too close:

Then turn the flag right side out and press.

Trim the little sticky out bits.

Now lay the flags out on the floor in a pleasing arrangement. I didn't worry too much but just didn't want two flags the same next to each other. Flip the over just to make sure the arrangement works on both sides then stack them up in order.
Assemble the bunting
To join and make the hanging cord I used odd lengths of bias binding that I had left over from other projects. You could use one long length, use ribbon or more long thin fabric scraps.
Fold the bias binding in half and begin stitching it together. Stitch for about 53cm/21" (for hanging the bunting up) then tuck the first flag inside and stitch across the top.

Just before you get to the end of the first flag, tuck the next flag in and then continue stitching.
Continue until all the flags are used, joining the next bit of bias binding by overlapping a little as needed.

Finish the bunting with another 53cm/21" of stitched bias binding at the end, again for hanging it up.
If you are a beginner sewist you might prefer to tuck all the flags inside the bias binding and pin the carefully before you start to sew but I didn’t find that was necessary. The flags are not very big and just adding them as you go is quicker and worked just beautifully.

Now all that's left to do is to feel a little bit pleased with yourself for making something so pretty from fabric leftovers. Your bunting garland is double sided so it’ll look great wherever you hang it. It’s washable so you can use it inside or outside.
Keep it for yourself or give it away as a lovely gift. This garland is perfect for parties or just to make every day just a little more fancy with some decorative garland bunting to brighten a plain corner.
Enjoy!
Julie
I'll be linking up to these great link parties, why not go and have a look!


