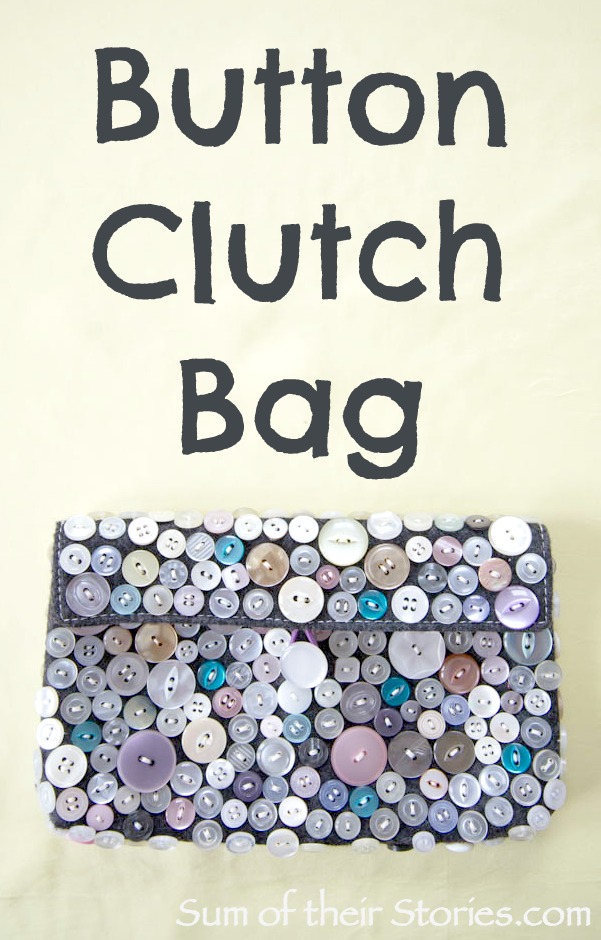
Button Clutch Bag
/Cover an old clutch bag with buttons for a whole new look.
This tutorial was first published in March 2017 and has been updated and republished
I am SO excited to have this clutch bag upcycle ready to share with you all today. This has been a long old time in the making!
I first had the idea that I'd like to cover a bag with buttons several years ago. I’d been keeping my eyes open in charity shops thinking I might see something suitable and was starting to think maybe I should just make a cloth bag myself. Then I took a long haul flight in premium economy. I thought premium economy was fab, well worth the relatively small extra charge for the extras we got....but this is not a travel review. On the overnight flight we were given little bags with a few toiletries. Very nice, very handy and a nice little clutch bag to take home and transform!
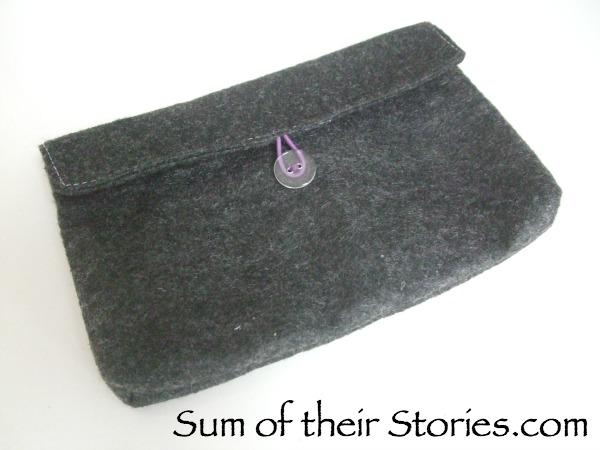
It was a grey felt with a button fastening and fully lined on the inside.

Next I needed to decide what buttons to use. I have a lovely large tin full of old buttons in my craft stash. First I considered using nice bright buttons in a mix of colours.
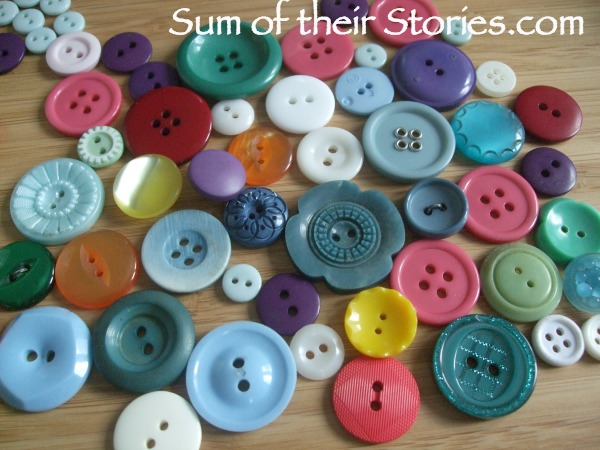
Then I thought about maybe using metallic buttons, which I liked the look of but even with my large tin of buttons I didn't have anything close to enough. Also most of these metallic buttons have shanks which would make the little clutch bag a bit too bulky.
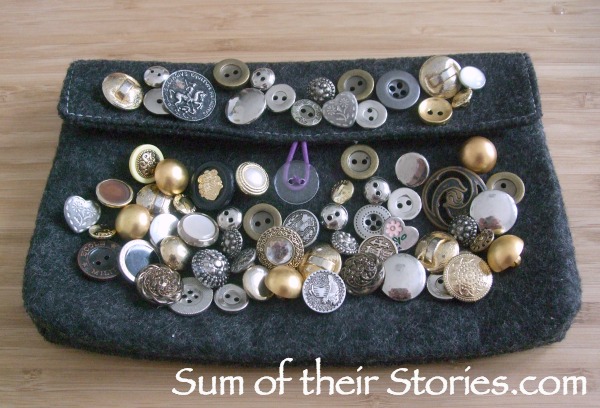
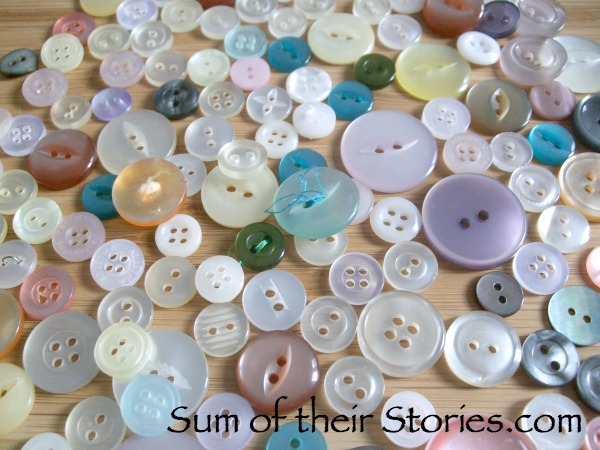
So I finally settled on pastel coloured pearl type buttons. I had plenty of them, most are old shirt buttons.
How to decorate a fabric clutch bag with buttons
What you need to embellish a plain fabric bag with buttons:
A small fabric bag
LOTS of buttons
A sharp needle
Sewing thread
Scissors
LOTS of patience!
This is a really simple makeover/refashion tutorial.
You simply sew the buttons on
Ha ha! So quick to type, SO time consuming to do!
The main things I learnt, i.e. my top tips are:
You will need WAY more buttons than you would think. I thought I had loads but ran out and had to wait to source some more from old garments and charity shop purchases.
Use regular sewing thread but have it double for strength.
Don't have your thread too long, it will catch on the buttons. Just accept you will have to cast off and start a new length of thread often.
It's a little tedious, so sew the buttons on whilst watching tv or listening to the radio, a podcast or audio book.
This is not a quick craft, it will take ages. That's ok, not everything has to be instant, not all crafts are quick.
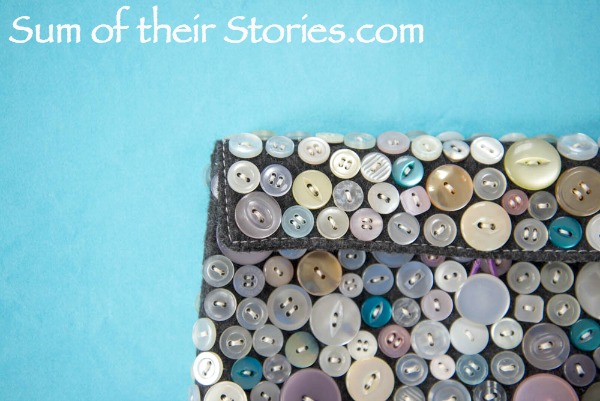
My bag had an elastic loop to secure it. I simply swapped the button it fastened to for one with a shank. What you do will depend on your bag of course.
Your bag will be significantly heavier with all those buttons attached.
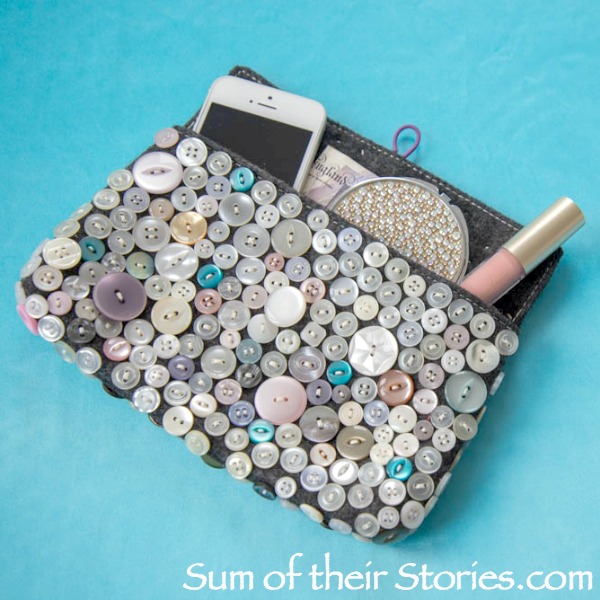
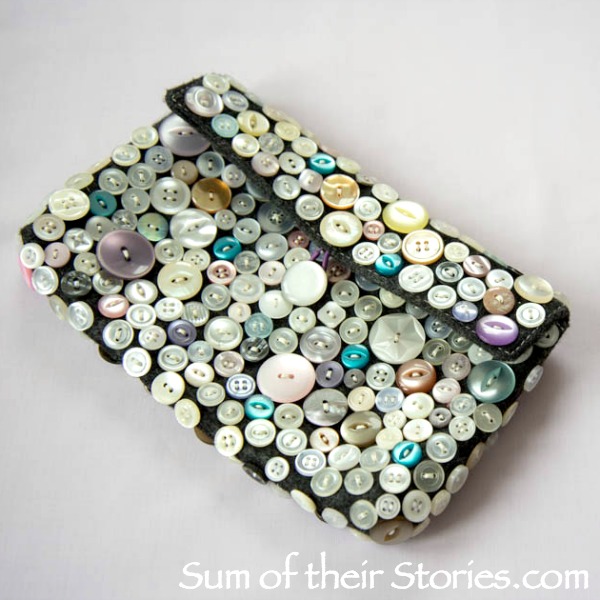
I’m thrilled with the results, the button covered bag is such a fun make and has been such a talking point whenever I’ve used it. This little clutch is just the right size for my phone, lippy, cash and keys; perfect for a night out.
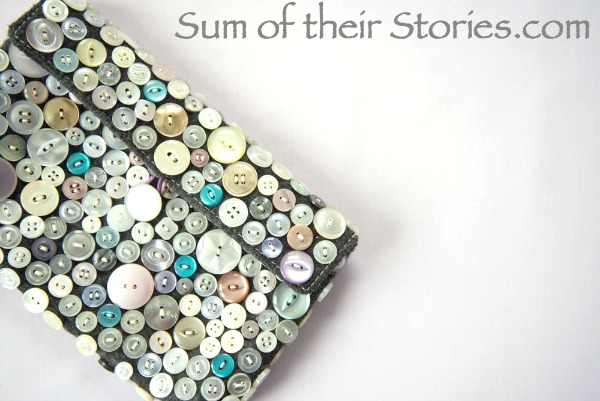
I did cover both sides of the bag, the back is the same as the front. I think I've mentioned before I like the back of anything to have pattern or design too otherwise I feel cheated. I guess that may be why it took so long and used so many buttons!
If you are not so fussy and are happy with a plain back to your bag then your button clutch bag decorating project would be much quicker and use less buttons.
If you wanted to make your bag upcycle even quicker you could just cover part of a bag, maybe just the flap? Or perhaps a panel if your bag had one. Or you could just add buttons in a strip either to one side or down the centre. Or maybe you could just sew a line of buttons all around the edge of your bag like an outline.

I am so pleased with my button clutch bag, it's very reminiscent of the amazing outfits of the Pearly Kings and Queens from the east end of London. I don’t know if you are familiar with them? It’s worth a quick google to see their outfits if you have a minute.
Do you have a tin full of old buttons that you’d like to use to embellish a plain fabric bag?
Julie
I’ll be sharing this project at these link ups