Cross Stitch Planter
/The simplest of cross stitch to upcycle an old tin into a plant pot.
I used to do a lot of cross stitch. I designed and sold a range of kits at craft fairs and had a few of my designs published in Cross Stitch magazines back in the late 80's/early 90's. Then I had kids, cross stitch went out of fashion a bit and that was the end of that! I made the kids samplers with their birth details but not much else since then.
I think cross stitch might be due for a bit of a revival. On Pinterest I've been seeing quite a bit of really nice cross stitch again and as part of my post moving house sorting out ("why on earth did I keep this?" you know the sort of thing) I found some 6 count Aida. This is the big stuff for beginners with large squares. We used to use this at primary school to make coasters and other lovely gifts for our parents! It has 6 little squares to the inch, hence the 6 count!
Just as I was thinking that I may as well use this Aida fabric to make something, at work my boss finished the last of her tin of Yannoh. It's a weird (sorry) coffee substitute thing that she drinks but it comes in a nice tin with no sharp edges and an easy to remove label. It's a recyclers dream!
Upcycle an old tin with a simple cross stitch design to make a pretty planter for your house plants
To make your own cross stitch planter you need:
An old tin or container to cover (plain is best as any label will show through the holes in the fabric a bit)
6 count Aida fabric or similar
Embroidery threads in your choice of colours
Needles, scissors, hot glue gun
Something to line your tin if it's not watertight
Remove the label from your tin if you can.
Cut the fabric to fit round your tin.
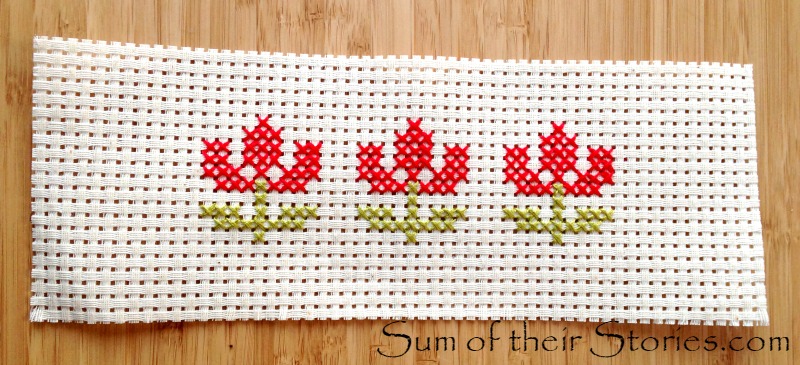
Using 3 strand of embroidery thread, stitch a design centrally on your strip of fabric.
You can get the chart for mine here or just right click on the chart below and then print.
You should end up with something looking like this.
Wrap the fabric round the tin then fix with a couple of lines of hot glue on the short edges, just where the fabric joins. I couldn't photograph this stage, hot glue on a metal tin cools pretty quickly so you need to be quick. Also I have only 2 hands! Here is what it looks like now. The glue is clear so any small bits that ooze though the holes in the fabric don't show too much.
This tin is not watertight so I've lined it with a piece of thick plastic bag. The plant is still in it's original plastic pot, just dropped into the fancy planter.
I shared some problems I'd had with tins as planters last week here and how I got round them.
After saying last week that herbs were a bit to much work for a windowsill I have backtracked and now have some flat leafed parsley in my Cross Stitch planter.
It was from an IKEA set of 3 paper wax lined cups with seeds to grow mint, basil and coriander that I was lucky enough to get as a gift at a baby shower. The mint didn't germinate at all so I just have cups of coriander and basil that are doing rather well at the moment. The IKEA cup fitted perfectly into the tin so for a little while I am actually back to living my dream of herbs on my kitchen windowsill - lovely whilst it lasts!
Julie
I'll be linking up at these great link parties
If you like creating your own planters for you house plants then you might be interested in these ideas too:


