Paper Cutting First Attempts
/It was my birthday last weekend! I have wanted to have a go at paper cutting ever since I saw people making lovely wedding invitations on one of Kirstie Allsopp's "Come on people, have a go at making beautiful things" programmes.
(That's not the actual name of the programme, but she's done quite a few now and I've watched them all and can't remember what I saw on which, sorry)
Anyway, a decent craft knife was on my "what I'd like if you want to get me a present" list. I was lucky enough to be given a lovely set of X-acto craft knives and a Fiskars swivel blade craft knife.
I've been playing with my new kit! This was the very first thing I did.
It's kind of fun, I just drew a quick design on the back of my paper and started cutting. Not quite Rob Ryan but the techniques take some getting used to! I started looking on the internet to get some tips and found this great site and tutorial from Robin Wilson Owen.
I experimented a little more and made a little initial. I think I'll make it into a bookmark for my niece Faith.
Then I got a bit more ambitious and thought I'd make a greeting card. First I drew the name Mia and a simple flower on a bit of regular scrap paper.
I turned it over and placed it face down on a bit of nice thick drawing paper. Then I scribbled all over the back to transfer it to the drawing paper. This way the writing will be the right way when it's finished.
Then I just started to cut it out. Slowly and carefully!
Robin Wilson Owen's tips are great so definitely check them out.
I got a bit carried away so there are no mid process photos of that design, however I did think to take photos of the design I tried next. I did this in exactly the same way, so the photos will now jump from design to design, sorry about that!
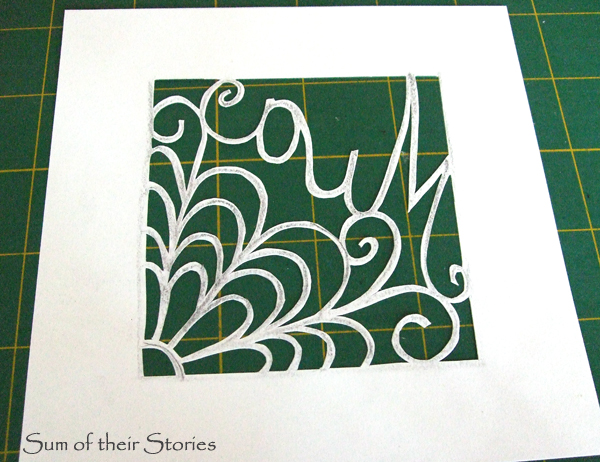
When it was all cut out it looked like this:
Whatever you do don't try to rub the pencil lines out, those little bits of paper will pucker & rip even if you go dead gently (apparently!) It's the wrong side anyway so no-one will ever see.
Turn it over to see the right side and the writing the right way round.
I am not the tidiest person when I'm being creative, perhaps I should have taken my own advice and made an envelope bin!
I mounted the finished pieces onto coloured paper then card.
I haven't worked out if there is a clever way to dot the i's yet so I added a little gem.
I am LOVING paper cutting. Yes, it is time consuming and very fiddly but the results are just so darn cute!
My first attempts are so far from the beautiful intricate designs I have started to collect on pinterest now but they are not too shabby either. I'm sure paper cutting experts can see all my mistakes, the lines are not very even or fine and there are a few little paper fibres in some of the corners.
I will practice, practice, practice because this is a lovely craft hobby and I just want to do more! Not one for the kids - those knives are really sharp and not for people who like instant results. However worth a try if you want something different with beautiful results and no big outlay on lots of equipment.
Julie
I'll be linking up this project at all these lovely link parties


