Unicorn Christmas Tree Ornaments
/Unicorns are everywhere at the moment. I'm not complaining, I love a good unicorn! So i thought I'd show you how to make a cute little unicorn ornament for your Christmas tree.
They are loads of fun to make so let's get stuck in.
To make your own Unicorn Christmas Tree ornament you will need:
White fleece or felt
Scraps of pink or peach felt
A selection of embroidery threads including black
Flowers - ribbon roses, little silk flowers, buttons etc
A mug and water erasable pen
Scraps of ribbon
A small amount of fibre fill
Sharp scissors and sewing needle
First, lay out your white fleece or felt fabric flat, doubled up and draw round the mug.
Remove the mug and draw on a horn and ears.
Cut out both layers.
Taking the top layer only, cut off the ears but leave the horn.
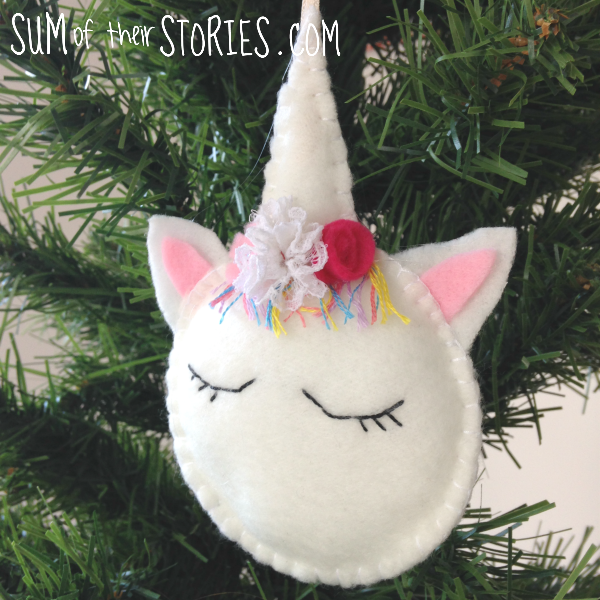
Draw eyes and eye lashes on the non ear layer - about half was down is best (the ones in this photo are a fraction high)
Cut some little long thin slightly rounded triangles from your scraps of pink or peach felt. You want them a little smaller than the white fabric ear but a little longer, use the photo as a guide.
Using 2 strands of black embroidery thread, stitch the eyes using a simple backstitch.
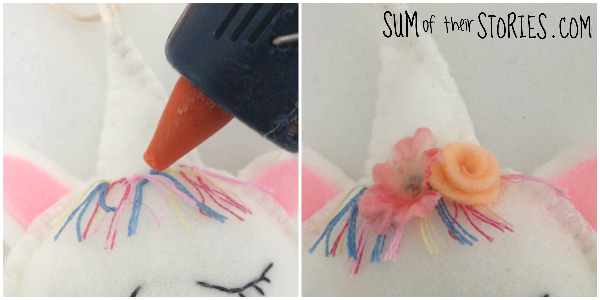
Now add in some hair. Take a couple of strands of pretty coloured embroidery thread on your needle and up close to the bottom of the horn, go in from the front, and out a few mm away. Tie a knot. Cut off and repeat all the way along. This is a great way to use up any short lengths of embroidery thread that you might have.
When you think the hair is full enough trim all the ends level.
Lay the front (non ear piece) on top of the back (ear piece) wrong sides together and using 1 strand of white embroidery thread or regular white sewing thread start to blanket stitch the pieces together.
I found it easiest to start in the bottom left. When you get to the ears make sure you go through all the layers but keep your thread at the front.
When you get to the horn, blanket stitch half way up then fold a 20cm (8") length of ribbon in half and tuck it in right at the top.
Carry on round with your blanket stitch making sure you go through the ribbon to attach it securely. When you get about 5cm (2") from where you started stop and lightly fill with fibre fill. Make sure you stuff a little right up into the horn first and then lightly stuff the rest. Don't overfill or it will be all distorted.
Now just carry on round with blanket stitch to close up the gap.
Rinse under the tap to remove any blue erasable pen, squeeze gently in a towel and allow to dry throughly,
Using a hot glue gun, fix of a few flowers to cover the hair line. You could sew things on if you want, but as I had such a mixture of little bits and pieces from my "never throw anything away" stash I found the hot glue easier.
Now sit back and admire this super cute thing you have made! And next, if you are anything like me, make a load more!
I've really enjoyed hopping on the unicorn trend. When someone told me that I live in a fantasy land, I nearly fell off my unicorn in surprise!
I did also try stitching these on the sewing machine instead of the blanket stitch. If you sew them right sides together and turn them out, they are super neat but the horn is not very pointy. When I put them wrong sides together - same as here in the photos - and stitched round with the machine I just found it too difficult to control and keep even. The blanket stitch is definitely my preferred method.
I do have a few of these unicorn ornaments listed in my Esty shop if you don't fancy making your own.
I’ll be sharing this project at these link ups


